
How to Start Your Own Website
August 6, 2021
Creating your own website can be a low cost (or free) way to establish an online presence, boost sales, and cater to a business’ unique needs. Best of all, a website is online 24/7, so anyone can access it any place, any time.
While most people want a really cool website, there seem to be a lot of roadblocks to even getting started. How do websites work? What would creating one look like? How would you share it? We will be discussing all of these things here with the goal of getting comfortable developing and sharing our very own website.
Understanding How Websites Work

Servers are file storage systems that make up the Internet. Hosting is a service that allows website files to be uploaded to a server and connected to a domain name.
Pages on a websites are HTML files at their core. HTML files contain markup (what most people call “code”,) that tells your browser what to display and how. This markup can easily be edited to add content, media, links or other types of page information.
Because websites are usually made up of multiple pages, it's important to understand how page locations are determined. Here is an example of website files and how their file locations relate to their addresses:

A webpage's address depends on its domain name, along with where an HTML file is located.
Setting Up Your Environment
Now that we have an idea of how websites and their files work, let’s make our own. Here are some tools that may be helpful:
- A computer with a couple of applications:
- A reliable web browser (Chrome or Firefox recommended)
- A text editor (Atom or Visual Basic recommended)
- A dotted/gridded notebook and pen (Optional)
- Water (Not optional, stay hydrated!)
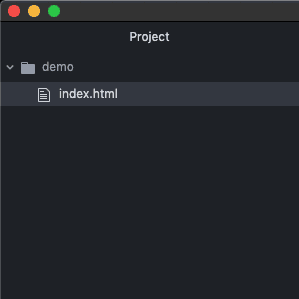
Once you've installed a browser and text editor, create a folder on your computer that will contain your website files. In a text editor of your choice, open the folder containing your website files so its contents can be browsed. Then, create a new file (or path) here called index.html.

In a web browser of your choice, open index.html.
There are now two ways you can view your website:
one that lets you edit its markup, (the text editor,) and another that lets you interact with it (the browser).
Creating Your Website
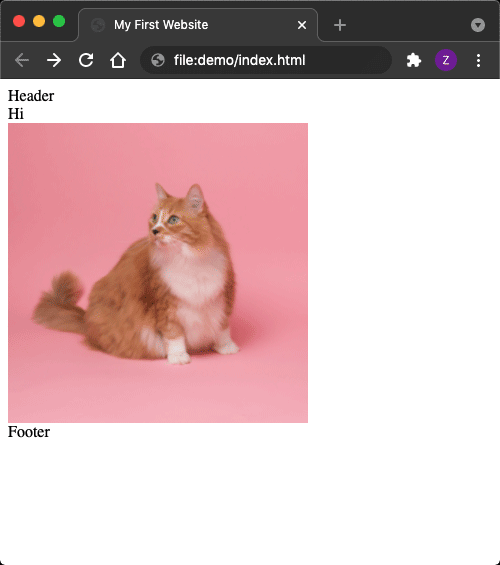
Now that our environment is ready, let’s add some content to our website. To do this, we’ll need to use the text editor to edit the blank index.html file. We can start out with something simple, like saying “hi”.
Once changes are made, save index.html and refresh the page on your browser. You should see it update with your message.
<html> and </html> are called tags: the first being an opening tag, the last, (with a slash preceding it,) a closing one. Tags are used in HTML to tell your browser what part of the file it’s looking at and how to process it.
Most websites also have <head> and <body> tags, so let’s add those, putting our message in the <body>:
To add a title, add <title> tags in the <head>:
When you refresh your browser, you’ll notice the title of the window update.
Let’s add an image. In the text editor, create a new folder in the same location as index.html called images:

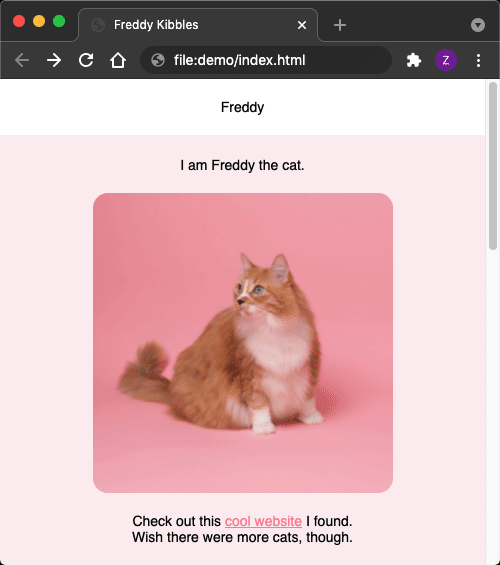
You can use your own photo or find an image online you want to use. (If you are sharing your website with the public, use something free-to-use.) I’m using this image I found of a cat from Unsplash:

Once you have an image, rename it to your liking and keep in mind what format it is. (Common formats include .png, .jpg, or .gif.) Move this image to your images folder:

To add our image, we’ll use an <img> tag. In this tag, there is a src attribute where the path of the image file must be referenced.
Save changes in the text editor and refresh your browser to see the image appear. If you’re like me, the image isn’t the ideal size. To change its width, we can add an id attribute to the <img> tag in order to add styling.
To set the image’s width, let’s add some CSS. Between the <head> tags, we’ll add a set of <style> tags. Here, we will use CSS to add styling to our image. Because we added an id, we can reference the image using a # symbol followed by its id. Directly after, there will be curly brackets containing styling information, like so:
By adding elements onto the page with id or class attributes, (An id is for a single element, a class is used for multiple,) we can specify styles for these elements.
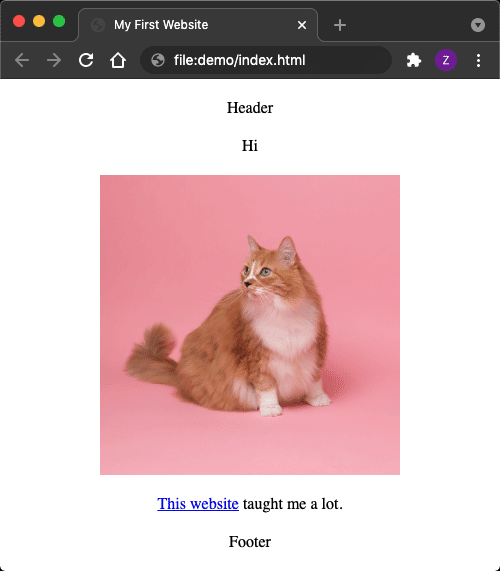
A <div> tag is an easy way to wrap content and add styling to it. Using this tag, we can create a header and footer. I'm also going to add a <br> (line break) between my message and image, so the image appears on a new line.
Not bad so far. Before making cosmetic changes, let’s add a link. Links are created by wrapping text or an image in an <a href> tag. (Note: the closing tag, </a>.)
Now that we have our page elements, let’s work on how they look. Moving back into the <style> tags, we can remove the default page margins and center everything on the page by adding this:
Let’s add styling to the header and footer, too. White space is an important aspect of web design in general, which can easily be achieved with padding or margins. (Padding is like margins, except it adds spacing in an element rather than around it.) Because I want to apply the same spacing to both elements, I can group them together using commas.
The page looks better already, but let’s improve it. We can make our content scroll further by adding a tall height to it, and make our header stay in a fixed position when we scroll. (This involves adding a few more lines of CSS so the header stays top-center.)
Next up is choosing a font. I prefer Helvetica, but there are lots of web safe fonts available.
We can also add background colors to our header and content to distinguish parts of the page. I'll also add z-index values to ensure that the header stays layered above content. (For choosing colors, you can use an online color picker, or install a color picker plug-in for your text editor.)
Changing the color of links can be done in many ways—let’s keep it simple for now. You can also make your image look more stylized by adding round corners with border-radius.
Lastly, I’m going to change the text content to fit the context of the cat photo I chose. (I'm unsure of the cat’s real name, but let’s just pretend Freddy is their alter ego.)
Sharing Your Website Online
There are actually many free website hosting options. Here are just a few I recommend:
- Netlify https://www.netlify.com/
- Heroku https://www.heroku.com/
- Vercel https://vercel.com/
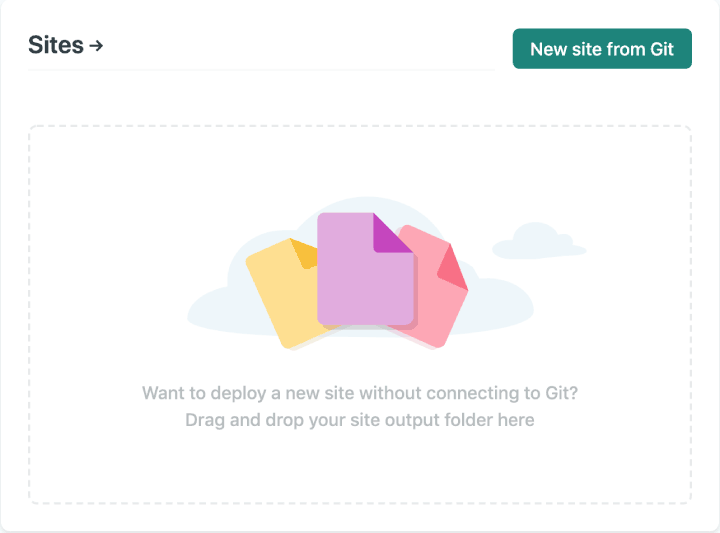
For this demonstration I will be using Netlify, but other platforms work pretty much the same. You’ll need to create a free account on a platform of your choice, and then navigate to their hosting application. For Netlify, it's app.netlify.com.
On a brand new account, there will be an area you can upload your website files with a drag and drop. (Make sure you are uploading the folder containing your website files.)
Once your website is uploaded, you should be redirected to your website’s information. From here, you can go to your site settings where you can set a free domain (with a .netlify.app extension).
We can also connect our own custom domain. Buying a domain is optional, but it’s cheap and makes your website look more reputable. A domain name registrar that I use and recommend is Namecheap, but others work very similarly. Registrars provide a way to search for and register your desired domain, most only costing about $10 yearly.
Once you've found and purchased a domain from your registrar, go back to your hosting platform and view your site settings. There will be section related to domain management; here, you can type in your new domain.
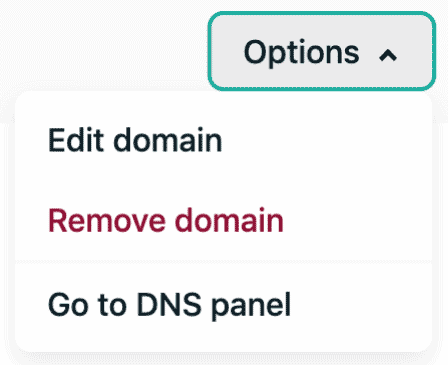
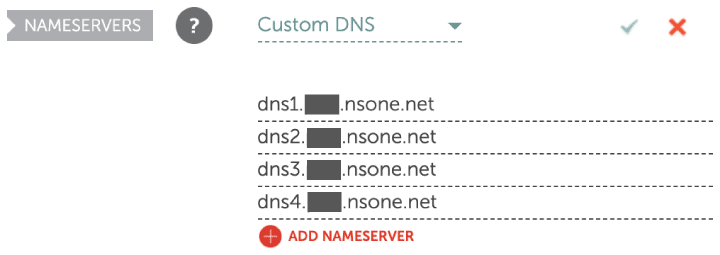
When you add it, the domain should appear in your custom domains with an error. To complete the setup, go to the domain’s options and navigate to the DNS panel (this might also be called ’Set up DNS’). Here, there will be a section that shows you hosting name servers that you'll need for your domain registrar.
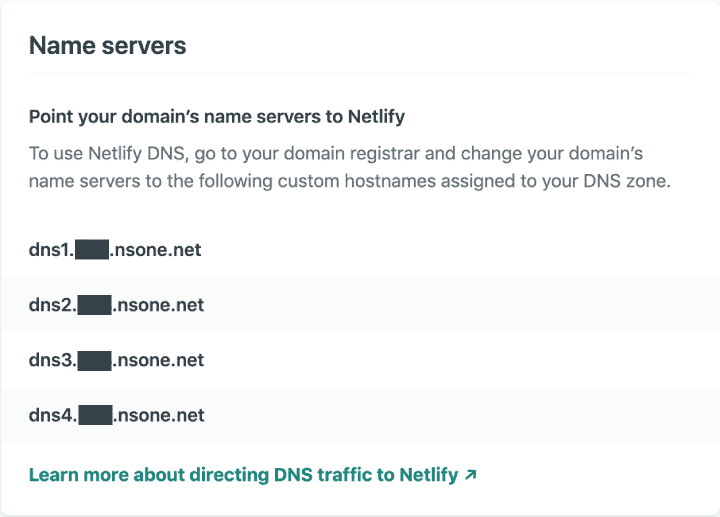
Back on your domain registrar, go to your list of purchased domains and view the details of your new domain. Under name servers, select the custom DNS option and add all of the name servers given from the DNS panel on your hosting platform. Make sure you save your changes.
These changes can take up to 24 hours to take effect, but once this process is done, your website is live. I hope that this walkthrough provided all you need to kickstart your website!
Here are some additional resources that can help add to your website building skillset:
- W3Schools https://www.w3schools.com/ (Referenced previously)
- Publish Something Online https://publishsomething.online/
- Google Fonts https://fonts.google.com/
- Codecademy https://www.codecademy.com/learn/learn-html
- My HTML Templates https://zacclarkwebdesign.com/2021/templates/